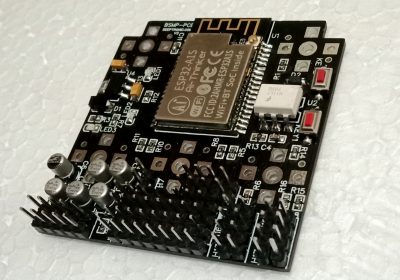
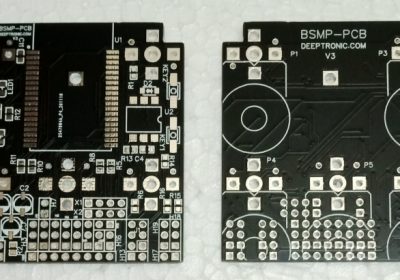
BSMP-BRD Blackstomp Board Manual

Table of Contents I. Schematic Diagram II. Bill of Materials III. Port Connector Layout IV. Potentiometer and Toggle Switch Mounting IV.1. Potentiometer Mounting IV.2. Toggle Switch Mounting IV.3. Reducing Enclosure Mounting Stress V. Development-Mode Wiring V.1. Wiring Diagram V.2. Bill of (Offboard) Materials VI. Firmware Programming Through Onboard UART Connector VII. Universal Drill Templates I. Schematic Diagram II. Bill of […]

Read more

BSMP-PCB Blackstomp PCB Manual

Table of Contents I. Schematic Diagram II. Bill of Materials III. PCB Layout IV. Port Connector Layout V. Manual SMD Component Soldering VI. Onboard Potentiometer and Toggle Switch Mounting VI.1 Potentiometer Mounting VI.2 Toggle Switch Mounting VI.3 Reducing Enclosure Mounting Stress VII. Development-Mode Wiring VII.1. Wiring Diagram VII.2. Bill of (Offboard) Materials VIII. Firmware Programming Through Onboard UART Connector IX. […]

Read more

II.1.2. Installing and Updating Blackstomp Library

After finished with the board installation for ESP32, we can proceed to the Blackstomp library installation: Download Blackstomp library from https://github.com/hamuro80/blackstomp , extract the zip file after download. Make sure you can find the library folder “Blackstomp” inside the “arduino-library” folder. On Arduino IDE, go to menu Sketch > Include Library > Add .ZIP Library, and navigate to the extracted library folder “Blackstomp” […]

Read more

II.3.9. Adding MIDI Interface

Before writing Blackstomp sketch with MIDI support, we have to be aware that Blacktomp library doesn’t provide direct support for MIDI functions. As the consequence, we have to use third party library if we don’t want to write our own MIDI low level functions. Installing MIDI Library Before we can compile the example code “midipedal.ino”, we have to install the […]

Read more

II.3.8. Adding Bluetooth Interface

Blackstomp core provide a very simple BLE (Bluetooth Low Energy) terminal interface for the easiest implementation. All you need to is just enabling the BLE terminal by calling enableBleTerminal() inside Arduino’s setup() and write the BLE terminal handler for the effectModule descendant class. Here is the example sketch code: You can see in the sketch code, the method enableBleTerminal() (at […]

Read more

II.3.7. Controlling The Analog Bypass

Blackstomp library provide two methods that control the analog path switching inside the audio codec: analogBypass() and analogSoftBypass(). Use analogBypass(true) to bypass the effect processor so the input will be routed to the mixer output. The ADC input will be disconnected from the input and the DAC output will be disconnected from the output mixer. The analog path is this […]

Read more

II.3.6. Controlling The LED Indicators

There are two LED indicators in Blackstomp, and we can easily control them through mainLed and auxLed objects. The object has 4 methods for easy and flexible control: turnOn(), turnOff(), blink(), and updateBlink(). Calling turnOn() method will turn the LED continuously-on, regardless the previous state (already turned-on, turned-off, or blinking). Calling turnOff() method will turn the LED continuously-off, regardless the […]

Read more

II.3.5. Writing Control Event Handler

From the previous volume level control example, rather than directly access the control[0].value inside the processing function, we can write a handler that compute an intermediate variable called gain and gainRange. Without these intermediate variables, we have to compute the control[0].value from 0-127 integer values into 0.0-1.0 (floating point) and convert control[1].value to gain range value (floating point) at every […]

Read more

II.3.4. Adding Parameter Control

To add parameter controls, we can setup one or more of control array element. Each element (control[0], control[1],..,control[5]) has mode which is set to default value CM_DISABLED by the system’s setup. Setup the control name (control[n].name) to a self-descriptive name for the control function, such as “Out Level”, “Gain”, “Distortion Level”, etc. The control mode (control[n].mode) can be set to […]

Read more

II.3.3. Writing Button Event Handler

Button’s event handler should be written if any change of the button’s state/value should trigger some task. For example, if we have to indicate the change by LED indicator or to compute some intermediate parameter value. To write the handler, we have to define the handler function void onButtonChange(int buttonIndex) inside the effectModule descendant class. Here is the example code: […]

Read more

II.3.2. Adding Foot Switch Control

Adding Main Foot Switch Button. Main user switch port (H13) is always available for the main button function. From the software point of view, the main button object is always available as button[0], but it need to be set up inside the init() function.button[0].mode is BM_TOGGLE, BM_MOMENTARY, or BM_TAPTEMPO. Without setting it up then its value will stay in its […]

Read more
1 2 3 4 9